

This post contains affiliate links. Read my disclosure policy here.
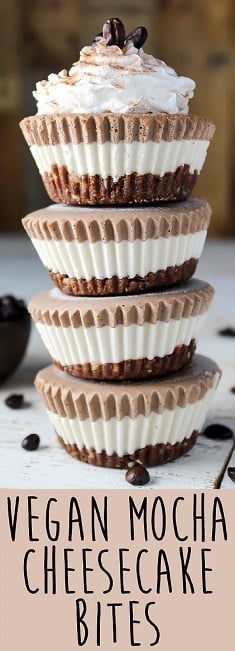
These Vegan Mocha Cheesecake Bites are creamy, chocolatey, and infused with coffee flavor. Made with a no-bake chocolate almond crust and layers of vanilla cheesecake and mocha filling, they're the perfect bite-sized dessert for coffee and chocolate lovers.
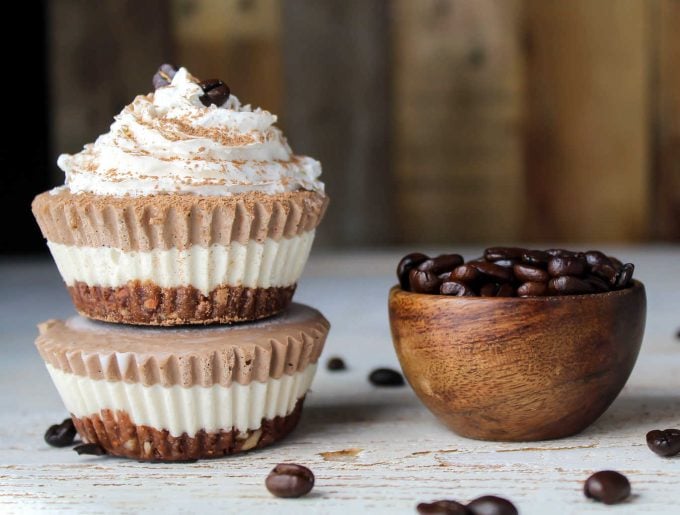
Sometimes you just need coffee. Or chocolate. Or cheesecake. And sometimes you need all three at once! These Vegan Mocha Cheesecake Bites deliver all those flavors in one rich, creamy, bite-sized dessert.
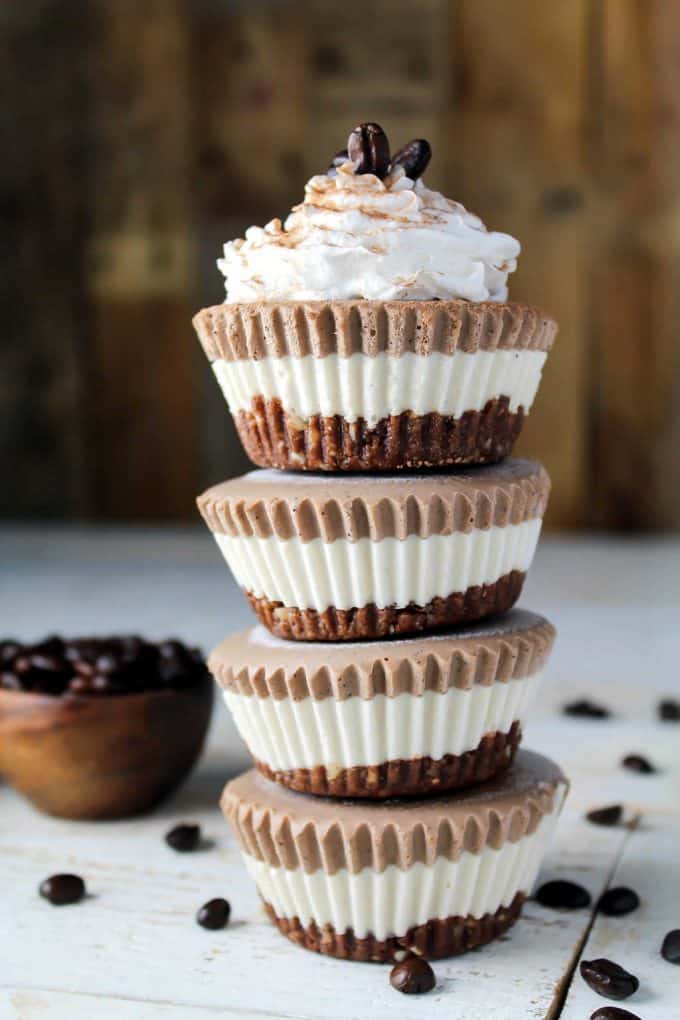
They start with a chocolate-almond crust that's naturally sweetened with dates and has just the right amount of crunch. The middle layer is smooth, creamy vanilla cheesecake made with cashews and coconut cream, and the top is a rich mocha layer with deep chocolate flavor and a hint of espresso.
Despite their impressive layers, they're surprisingly easy to make with simple, wholesome ingredients like cashews, coconut milk, almonds, dates, maple syrup, cocoa powder, and espresso powder. No baking required!
Enjoy them straight from the freezer, or top each bite with a swirl of dairy-free whipped cream and a light dusting of cocoa powder for an extra-special treat. They're perfect when you're craving something cool, creamy, chocolatey, and just a little coffee-kissed.
Did you make this recipe? Let me know what you think by leaving a star ⭐️⭐️⭐️⭐️⭐️ rating and sharing your feedback in the comment section below. It would make my day!
⭐️ Subscribe to the Vegan Huggs Newsletter and receive weekly recipes straight to your inbox! You'll also receive my FREE eCookbook featuring my top 10 recipes.
Recipe
Vegan Mocha Cheesecake Bites
Ingredients
Chocolate Almond Crust:
- ½ cup raw almonds
- ½ cup dates , pitted (*see note)
- 2 tablespoons unsweetened cocoa powder (or raw cacao powder)
- A pinch of salt
Cheesecake Base:
- 1 ½ cups raw cashews (*see note)
- 1 cup coconut cream (*see note)
- ½ cup pure maple syrup
- ⅓ cup coconut oil , melted
- 2 teaspoons pure vanilla extract
- ¼ teaspoon salt
Additional Ingredients for Mocha Layer:
- 1 ½ teaspoons espresso powder (*see note)
- 2 tablespoons unsweetened cocoa powder (or raw cacao powder)
Recommended Equipment
- Standard Muffin Pan
- Standard Muffin Liners
Instructions
Crust
- Place the almonds, dates, cocoa powder, and salt in a food processor. Process until the mixture forms a loose dough that sticks together when pressed between your fingers. If it's too dry, add another date. If it's too sticky, add a few more almonds.
- Line a muffin pan with standard-size liners. Put about 1 heaping tablespoon of crust at the bottom of each liner. Press firmly down. Place in the freezer while you make the filling
Vanilla Cheesecake Base
- Add cashews, coconut cream, maple syrup, coconut oil, vanilla, and salt to a high-powered blender. Blend until completely smooth and creamy.
- Spoon 2½ tablespoons of filling over each crust (measurements don't have to be exact, but try to keep it close so you'll have enough for the mocha layer). Place back in the freezer for about 20 minutes to firm up the layer a bit.
Mocha Layer
- Place the cocoa powder and espresso powder into the remaining filling. Blend until smooth and fully incorporated. Add 2 ½ tablespoons of filling on top of the vanilla layer.
- Freeze for 4 to 6 hours, or until firm. Let sit at room temperature for 3 to 5 minutes before serving. Top with homemade or store-bought whipped cream if preferred. Enjoy!
Notes
- Cashews: A high-powered blender, such as a Vitamix or Blendtec, works best for creating a silky-smooth cheesecake filling. If you're using a standard blender, soak the cashews in very hot water for 15 to 20 minutes (or cool water for 4 hours) to help them blend smoothly. Otherwise, the filling may have a slightly grainy texture.
- Dates: If the dates aren't soft and somewhat moist, soak them in water for 15 minutes before using. Drain well, and pat dry before use.
- Crust: If the crust sticks to your fingers and is difficult to press into the liners, use a small round jar lined with plastic wrap to press it down. I used the tamper from my food processor, and it worked perfectly.
- Coconut Cream: If you don't have it, use a can of full-fat coconut milk instead. Refrigerate it overnight without shaking, then scoop out the thick cream from the top. If needed, add a little of the liquid to reach 1 cup. Some brands don't separate well, but the recipe will still work-the cheesecake bites just won't be quite as rich and creamy. I recommend Native Forest, Trader Joe's, or Thai Kitchen.
- Mocha Layer: If you'd like a stronger coffee flavor, add ½ to 1 teaspoon more of espresso powder, depending on your taste.
- Storage: Store the cheesecake bites in an airtight container in the freezer for up to 2 months. Let them sit at room temperature for 3 to 5 minutes before serving.
- This recipe yields about 10 cheesecake bites.
Nutrition


Rose
Can you offer a recommendation for a substitute for the dates in the recipe? I’d like to add NO dried fruit. Thanks in advance!
Parita
These look amazing and I want to try them out but I don't love coconut oil flavor. Can I replace the coconut oil with canola oil without compromising on the consistency? Or would you recommend using vegan butter instead to replace coconut oil?
Melissa Huggins
Hi Parita, I don't think it'll work the same with another oil. Coconut oil solidifies when chilled and creates the perfect texture. Have you tried refined coconut oil? The coconut taste is very slight.
Maren
I Im obsessed with these. I love the cashew cheese cake filling. My horse loves it too. Not kidding. On special occasions I bring her a cupcake bite with this filling. Am I crazy?
Melissa Huggins
Thank you, Maren! I'm so happy you like them! You're not crazy at all. I think it's wonderful that you give your big horse baby a treat. 🙂
Miranda
Made these for my co-worker for her birthday and they were excellent! The recipe was bang on. I had to double the recipe for a large crowd and I would recommend using a blender if you do - my food processor was a little overwhelmed. I would definitely make again! Thank you for the excellent treat!
Melissa Huggins
Hi Miranda, I'm so glad you liked them! Such a nice thing to do for your co-worker's birthday. I hope they had a great time. 🙂
Bernie
Wow! These are FANTASTIC. I tasted the "vanilla" layer when it first came out of the food processor and couldn't believe how tasty it was. I can't believe I actually ended up with 10 finished "bites". I use coconut milk all the time but always get the low fat kind. I was amazed at the luxurious creamy texture of the "cream" after leaving the can in frig overnight.
Thanks for sharing this!
Melissa Huggins
Thank you, Bernie! I'm so happy you liked them! I really like the texture of chilled coconut milk too. It's quite magical!
Tamika
Hi there!
Are you supposed to refrigerate the can of coconut cream or only if you're using coconut milk?
Melissa Huggins
Hi Tamika, Sorry for the late response. This comment was in my spam folder 🙁 No, you don't have to chill the can of coconut cream. Thanks for stopping by.